To add a city to the Weather App in iOS 14, simply open the app and tap the ‘+’ icon to search and select your desired city. Once added, you can view the weather details for that location effortlessly.
When using the Weather App on your iOS 14 device, it’s convenient to have quick access to the weather conditions of multiple cities. Adding a city can be done with just a few taps, allowing you to stay informed about different locations around the world.
In this guide, we will walk you through the simple steps to add a city to the Weather App on iOS 14, ensuring you can easily check the weather wherever you are or plan to go.

Credit: www.youtube.com
Why Add A City To Weather App
Adding a city to your weather app iOS 14 can provide personalized updates and benefits. By adding multiple cities, you can easily check the weather of various locations without the need for manual searches. This feature allows you to receive personalized weather updates for your favorite cities, enabling you to plan your activities accordingly. Additionally, it simplifies the process of checking the weather of different cities, making it more convenient and efficient. You can stay informed about the weather in various locations without the need to switch between different weather apps.
Credit: support.apple.com
Step 1: Open Weather App
To add a city to the Weather App on iOS 14, begin by opening the app. Simply locate the search bar and type in the name of the city you want to add.
| Step 1: Open Weather App | Locating the Weather App Icon | Tapping on the Weather App Icon |
| You can easily find the Weather App icon on your iOS device. | Look for a cloud symbol with a sun or raindrop inside. | Simply tap on the Weather App icon to open it. |
| Once the app is open, you will see the current weather conditions. | Check the temperature, humidity, and forecast for your location. | You can also add multiple cities to track their weather. |
Step 2: Access City Adding Option
To add a new city to the Weather app on iOS 14, simply follow step 2 by accessing the city adding option. This allows you to customize your weather experience and stay up-to-date with the forecast for multiple locations.
| To add a city in weather app iOS 14, go to settings. Locate the “Add City” button. Click on it to access the city adding option. You can also navigate to the Add City option directly from the main screen. |
Step 3: Search For Desired City
To add a city to the weather app on iOS 14: Open the weather app and tap the search bar. Input the name of the desired city in the search bar. Alternatively, tap the current location to get the weather information for your current location.
Step 4: Confirm City Addition
Once you have successfully followed the steps to add a city to the Weather app on iOS 14, it is important to confirm the city addition to ensure accuracy. To do this, you need to select the correct city from the list of options provided.
When selecting the correct city, make sure to choose the one that matches the location you want to track the weather for. Pay attention to the spelling and consider using the search bar to filter the results for faster identification.
After selecting the city, it is recommended to double-check the name and location to avoid any errors. This is especially important if you are adding a city with a similar name to others.
Confirming the addition of the city ensures that the Weather app will accurately provide weather information for your desired location. Double-checking through these steps will help ensure a seamless experience when using the Weather app on iOS 14.
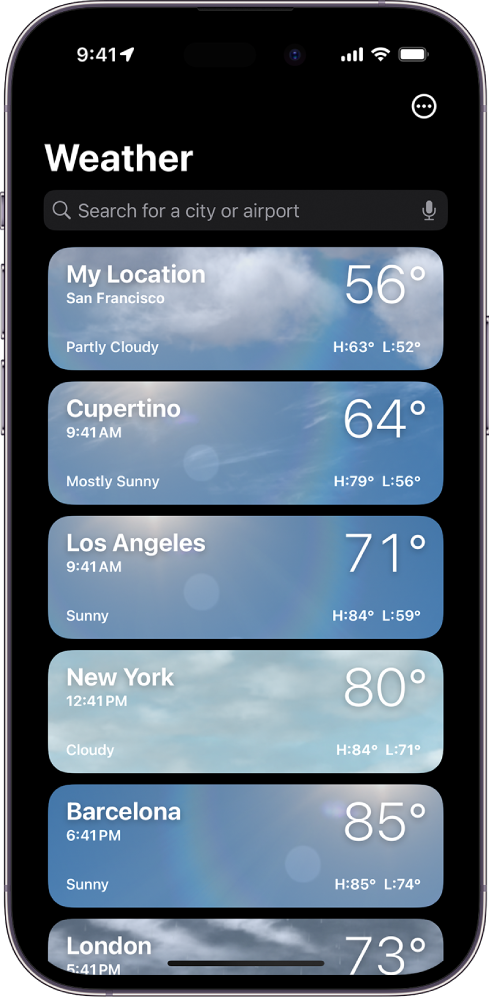
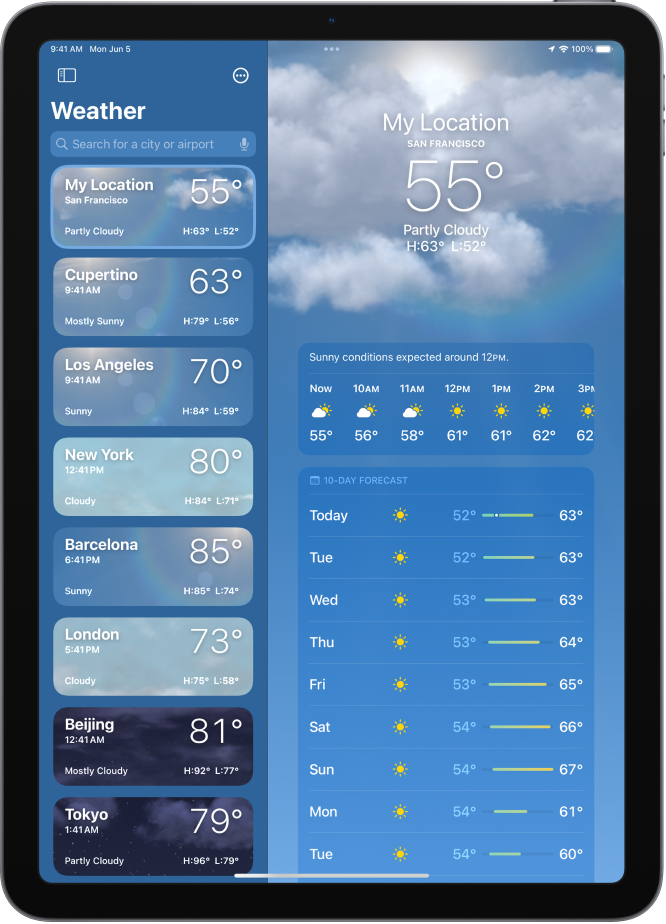
Step 5: Arrange City Order
In iOS 14, adding cities to your Weather app is a simple process. To arrange the order in which your cities appear, follow these steps:
| Step 1 | Open the Weather app on your iPhone. |
| Step 2 | Scroll down to the bottom of the screen and tap on the “+” button. |
| Step 3 | Search for the city you want to add using the search bar at the top. |
| Step 4 | Once you find the desired city, tap on it to add it to your Weather app. |
| Step 5 | To change the order of the cities, tap and hold on a city, then drag it to the desired position. |
If you want to set a default city that appears at the top of your list, follow these additional steps:
| Step 1 | Go to the Settings app on your iPhone. |
| Step 2 | Scroll down and tap on “Weather”. |
| Step 3 | Under the “Default City” section, select the city you want to set as your default. |
With these simple steps, you can easily add and rearrange cities in the Weather app in iOS 14. Keep your most important cities at the top for easy access to their weather information.
Step 6: Removing A City
To remove a city from the Weather app on iOS 14, start by locating the city you want to delete. Tap on the city to open its weather details. Next, find and tap on the “Edit” option in the top-right corner of the screen.
Once you’ve tapped “Edit,” you’ll see a red minus sign (-) next to each city. Find the city you wish to remove and tap the minus sign next to it. A confirmation prompt will appear, asking if you want to delete the city. Tap “Delete” to finalize the removal process.

Credit: www.youtube.com
Tips For City Management
Discover effective tips for managing your city on iOS 14 Weather App. Learn how to seamlessly add your city to stay updated on the latest weather conditions, ensuring a well-managed and informed urban environment.
| To add a city to the weather app on iOS 14: |
| 1. Click on the “+” icon and type the city name. |
| 2. Tap on the city to add it to your list. |
| 3. For city management, group cities by region for easy access. |
| 4. Quick access: Add a widget on your home screen for instant weather updates. |
Conclusion
Incorporating a new city into your iOS 14 Weather app is simple and straightforward. With just a few taps, you can stay updated on the weather conditions of any location. This customization feature allows you to keep track of various cities, ensuring you are always prepared for any weather changes.
Explore and enjoy this convenient addition to your iOS 14 Weather app today.